
The The Forge World Castellum Strongpoint Painting guide
We are re-visiting one of our older painting projects which we carried out a year ago.

Phase 1

First I sprayed with cilit bang dirt and grime remover to get the release agent off. Then it was time for a Castellum Bath time. Nice warm water and a good scrub all over. Then rinse and leave to dry over night.

I then gave the whole tile a once over with Halfords adhesion primer enamel spray paint, so the spray paint does not flake off as easily.
Then I covered the central area with chaos black and the ramparts with Halfords Grey spray primer. I used up one whole can on this!
I then gave it a good spray with Purity seal to lock it in a bit
Phase 2

I covered the models' grey parts in several sponged shades of grey. First was a heavy all over Codex Grey. All greys below were thinned with Lahmian medium.

Followed by Codex grey mixed with Fortress Grey, more towards the edges and corners as well as a few sporadic internal areas more central on each ferrocrete face.

Then a highlight sponge of Fortress grey to represents chipping on edges.

Followed by a Celestra grey to finish the edges off. Further wash shading and streaking will come later guys.


A mix of Rhinox hide, Warplock bronze and Abaddon black was sponged and drybrushed all over the metal surfaces to give it a worn and used steel look. Graphite (pencil) was put on the edges of really worn steps.
I took extra care to show well trod routes. Further powders and washes will be applied later chaps.

Ok then guys. The Admantium spacers / bonding plugs (or whatever) were done with an undercoat of Leadbelcher. Washes and weathering will come later everyone.

This was also done on the top of the command building.
Forge World Castellum Phase 3.
Ok then. To tackle the huge compound I wanted to have very worn looking Plasteel.

Firstly the area was under coated chaos Black. Then I masked up the Ferrocrete walls to save them from harm.

Using my airbrush I sparayed a thinned Warplock bronze over the entire area in patches.

I then added Leadbelcher to the remnants of the Warplock Bronze mix and re sprayed it again, taking care to build up the Silver on the main beams at a low pressure. I then added more Leadbelcher and did it again.

I then did a dark wash (equal parts: Lahmian, Abaddon Black, Water and Agrax Earthshade). If I could do it again I would have added more water.

Above view.
I also at this phase base coated the door, window and vent trims with Runelord Brass. Just to add another dimension to the piece. Too much silver would be very flat.
The window panes were Abaddon black with a small amount of a medium blue with an Ard'coat finish. No matter how hard you try windows that big will never look amazing.
I washed the metal work with the same wash I mentioned above and drybrushed chainmail over the top to add a bit of highlight to it.
So left to do is:
The final airbrush shading which I have never done before.
The details of the terminals, cables and projectors.
Weathering airbrushing to the ground recesses.
Streaking of grime.
Phase 4

Starting from here . . .

Using my shading wash of equal parts water/ Lahmian/ Abaddon Black and Agrax Earthshade which I made in my previous phase, I carefully started adding shading and streaking. This was done slightly under the edges/ lips of items, under windows and in recesses with an Airbrush.

I then did one part Tamiya Flat flesh and two part Tamiya flat brown thinned to do the bottom of the exterior walls and spots on the walkways where dirt would accumulate.
Here is a better representation of the colours as they come together.

I also used a tiny amount of MIG Gulf war sand in the recesses which was then fixed in place with white spirits (by flooding the surfaces with a paint brush and being careful not to disturb the powder).

I will be finishing the sand and weathering the centre in the next phase, as well as the Tarantulas
Phase 5

I used the Games Workshop scenery pack brown for the base layer for the sand areas.

I then did a heavy drybrush of Ochre to make it look like dark sand.

I then used various shades of grey and sand colours to do the rocks.

I then painted the cables and details.

I used MIG gulf war sand powder to add some sporadic splashes of settled sands. This was then bedded in with a flood of white spirits and left to dry. When dry I re-airbrushed the sand sections with my shading wash (Abaddon black, Agrax Earthshade, water and Lahmian) with a drop or 2 of fairy washing up liquid to help dry into the corners.

The Castellum finished.

The Tarantulas were done in the same scheme as for the main building.
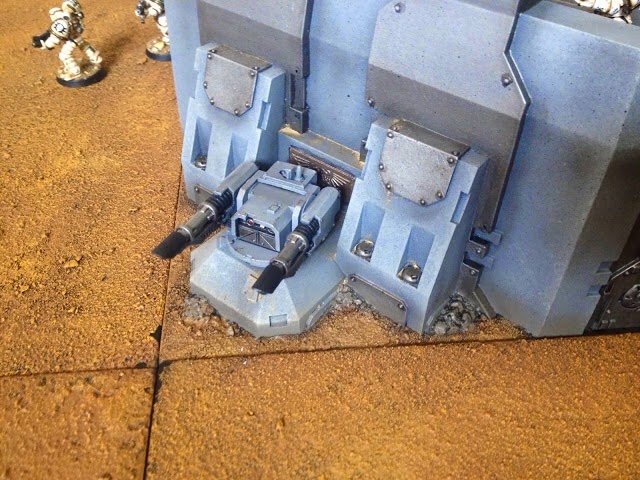
Twin Lascannons

Air Support
Forge World Castellum Strongpoint Finished

Here it is. My finished Castellum. Such a great project which I have enjoyed thoroughly. My favourite part was the airbrush weathering that I did.
Why did I paint it generic Grey? Well I needed it to be used by all Legions that we will be collecting. Also I want to use it as a objective piece for several story types which have been planned for our Great Crusade campaign.
We will be Blu-Tacing painted Legion Brass Icons From Forge World on to the piece to represent the Castellum belonging to certain Legions, for our Story battles.
Drake Seta
I love this bit of kit. We use it alot for our photos due to its sheer awesomeness! You should be very proud of how this turned out. Lovely guide too :)
ReplyDeleteCant wait to do the Thunderhawk tile too.
Hi drake I would be interested in a commission painting the same board as per your tutorial above. Could you email me at eric86@web.de pls? I found no contact form on the blog here unfortunately
ReplyDelete