After the most recent WIPR on the blog a few people asked after my magnetised Phalanx Wardens.
Now I guess I hadn't thought that this was anything other than normal. I forget myself sometimes and that I've been doing this a very long time and therefore I've had a lot of practice.
So how to get the best from versatility.
This can be transposed to any models really. Especially the new BaC minis if you want to run different weapons on a Vet Squad.
The key to this is patience. And picking the right parts.
Apologies for the pics it's quite hard to get decent shots one handed.
So here you can see I've substituted in a plastic right MK IV arm from the BaC minis. This was to provide a better platform for inserting a magnet. And it would marry up to the majority of the weapons options.
Here you can see I've taken one of the small 2mm x 2mm magnets and I've added it to the one already fitted to the arm. I do this everytime to ensure the polarity is correct then the weapon hand will always fit.
You'll need:
2mm x 2mm Magnets! I buy mine from Tabletop Tyrant/Gifts for Geeks (same company). They also make their own carry cases too.
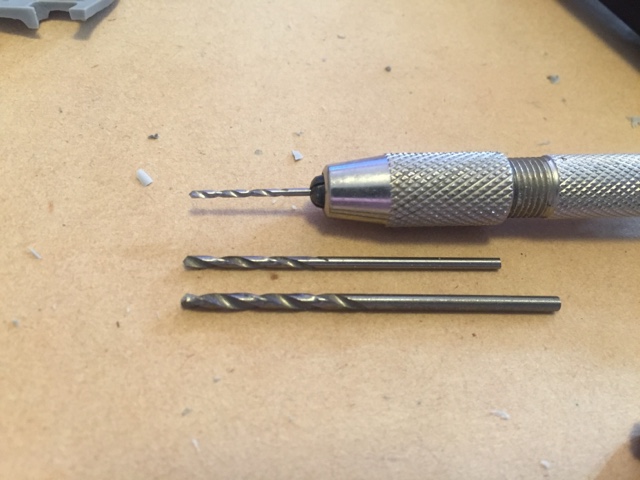
A 1.0/1.2mm drill bit for widening the hole if you wish.
Then a 2mm drill bit for the required hole size.
Drill the pilot hole.
If you want feel free to widen it.
I personally go straight for the 2mm bit as the plastic is soft.
Here the 2mm hole is widened ready. At this point I'll offer it up to make sure it's a snug fit. Then apply a tiny amount of super glue.
Magnet fitted. Leave to dry for 5-10 seconds.
One Phalanx Warden with a shiny new Combi-plasma :)I've done this for two of my Wardens as for every 5 I have that option of a special weapon or combi-weapon. I could have also done it for my Vet Sgt in hind sight but as I have several Vet Sgt options this wasn't an issue.
Again as I said you can do this for any mini really especially using the BaC minis.
I hope this was helpful to you all out there and if you want to see more or have any questions fire away and let me know.
Until next time
-Tylar ;D


That is damn sweet. Some good skillage there mr Fasolt.
ReplyDeleteGreat tip. Have to look into those 2x2 magnets.
ReplyDeleteBit pricy those magnets. Been using guysmagnets.com (uk) company and the offer 100 2x2 for £3,24. Been using alot of their 3x3 and 5x5 magnets for my titan. Very happy with their service.
DeleteI just bought them from there as its my local store. Anywhere else is obviously an option. And for that price I'll probably check those out thanks WildEye.
DeleteThank you really much, it is most useful! Hadn't seen those magnets, but they look just right for the job. The only issue is to get the hole right, it looks like there is not too much margin.
ReplyDeleteThank you really much, it is most useful! Hadn't seen those magnets, but they look just right for the job. The only issue is to get the hole right, it looks like there is not too much margin.
ReplyDeleteMagnets are great fun, been doing this to my HQ's for a while now. Except when you stuff up the polarity... How do you see the Wardens? Ive got my Sarge with the axe but the rest bolters atm.
ReplyDeleteFantastic article, really useful especially for me as I'm planning a unit of 20 Wardens.
ReplyDeleteThanks let us know how you get on :)
DeleteThat's pretty cool! I never dared to magnetize, but may try it in the future ^.^
ReplyDeleteQuick question Tylar, any reason you didn't use the plastic MKIV legs?
ReplyDeleteActually I contemplated this. The problem is they're bigger than the standard team MK IV and it was a real torn situation for me. What I did was compromise and use the plastic legs for the Vet Sgt making him slightly more bulky with one of the Imp Fist upgrade torsos.
DeleteThis then gives him te the feel of artificer armour. Here is a picture of him in the previous WIPR from the 12th Jun go check it out.
Hope this helps :)
He does look imposing! I think I want all my guys to look like that. I aim for them to be a bit of a target.
Delete