
Hi all
Eyecon74 set his mind to something awesome and these are the results!
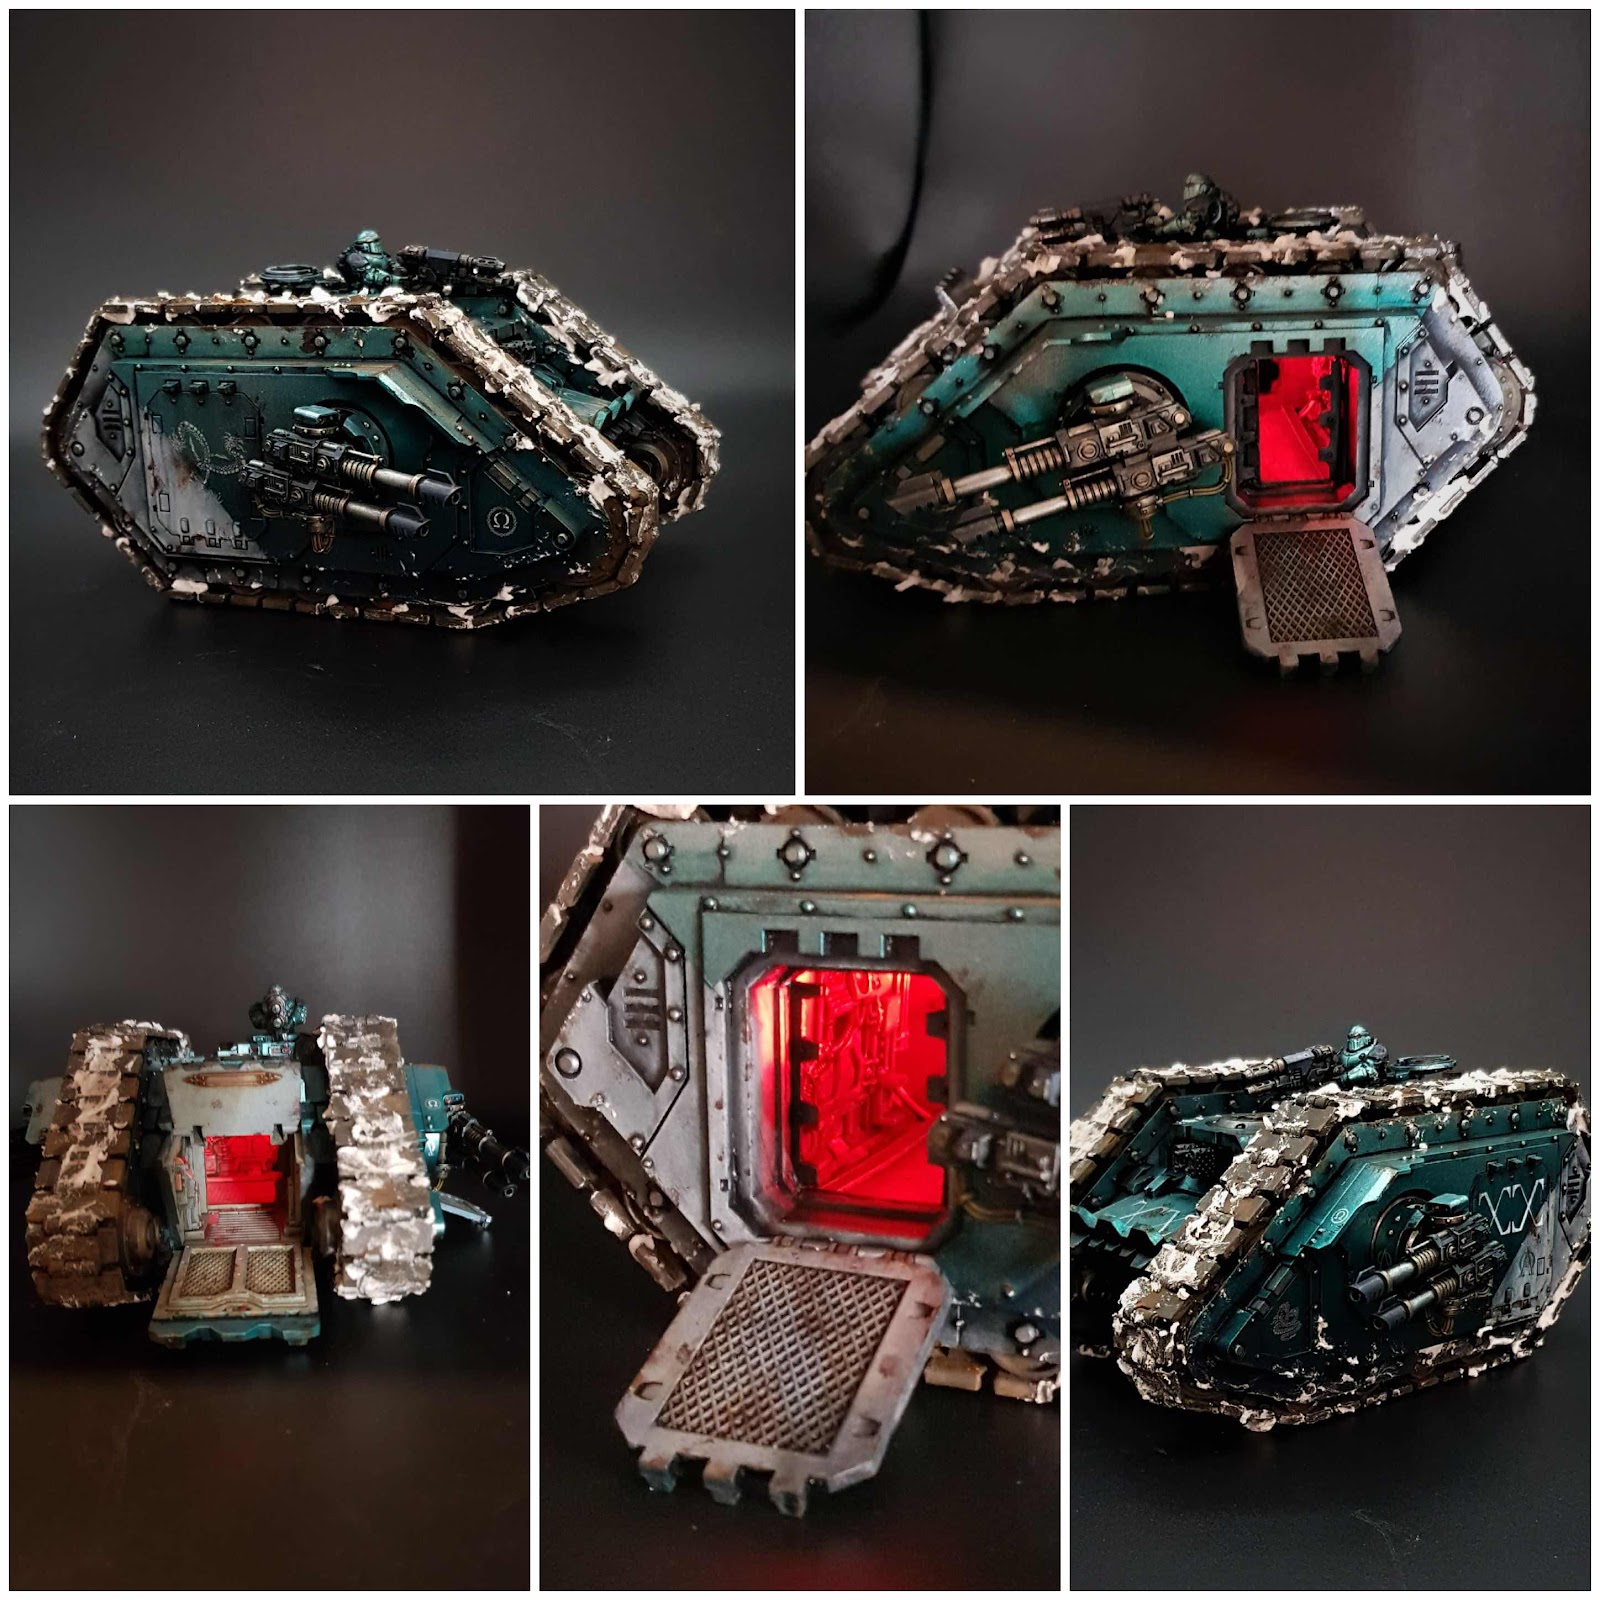
As soon as I saw the Land Raider Carrier I wanted to make an interior for it, and to top it off, I wanted to add some LED's to boot.
FIrst thing I did was to create the interior of the tank, first thing I did was to carefully cut the access doors in the sides, I then used a file on the the back of the doors until the 2 halves came apart and glued them back on in an 'open' position.
The floor is made from a sheet of plasticard and the edges were done with some more plasticard strips I had:

The Engine Wall (which doubled to hide some of the wiring and connectors) is from one of the Mechanicus terrain kits, I just trimmed the sides, but other than that it sits quite neatly in the tank.
For the walls around the drivers compartment I used some 5mm PVC Foamcard (5mm is a bit overkill, but I did not have any other to hand, at least it's sturdy !).
I also filled in the insides of the track units with some plasticard, in hindsight this was not necessary as you can barely see the inside anyway !

On the opposite side to the driver section I also placed a wall.
Lastly I added a bunch of details like a door to the driver compartment, a few seats, a scanner panel etc.
I used some spare bits from the Rhino kit for the door and panel.
I then painted the insides, I did not do much for the roof as it is not visible at all.

When making interiors, please make sure you dryfit, dryfit, dryfit, I did not have enough hands to keep all the parts in place, and I was forever going back and forth sanding, cutting, adjusting bits, I messed up the length of the floor panel and had to glue a bit back on, looks a little messy, but it is hidden in the finished product.
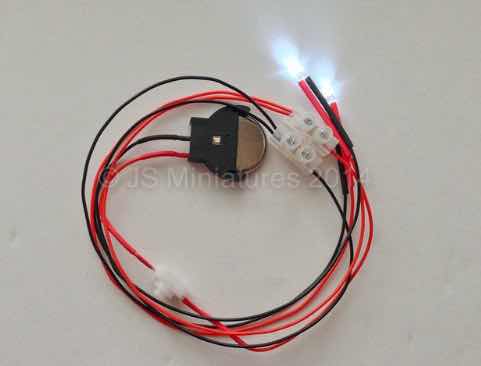
Now that I had the insides done, I could get to work on the LED's,I had never used LED's before, but I went to the website www.smallscalelights.co.uk and found the ones I wanted. There is plenty of useful information on the site, as well as several other lighting kits, well worth checking them out.
They also post lightning fast, I had my delivery the next day, perfectly packaged and with instructions.
The only thing you need to get yourself are some of the CR2032 3V coin batteries
I am not gifted when it comes to working with electrics, but luckily the lights come with the resistors, wiring, on off switch and battery holder already attached, they also have ample length of wire to give plenty of flexibility where the LED's can go.
I decided I wanted them out of view as I sometimes see LED's on vehicles and they are so bright it hurts my eyes, I drilled through the driver compartment and the wall on the opposite side, I placed them so they would face to the back of the tank, shining on the inside.

In this shot you can also see I managed to hide the wiring and connector block in the engine compartment
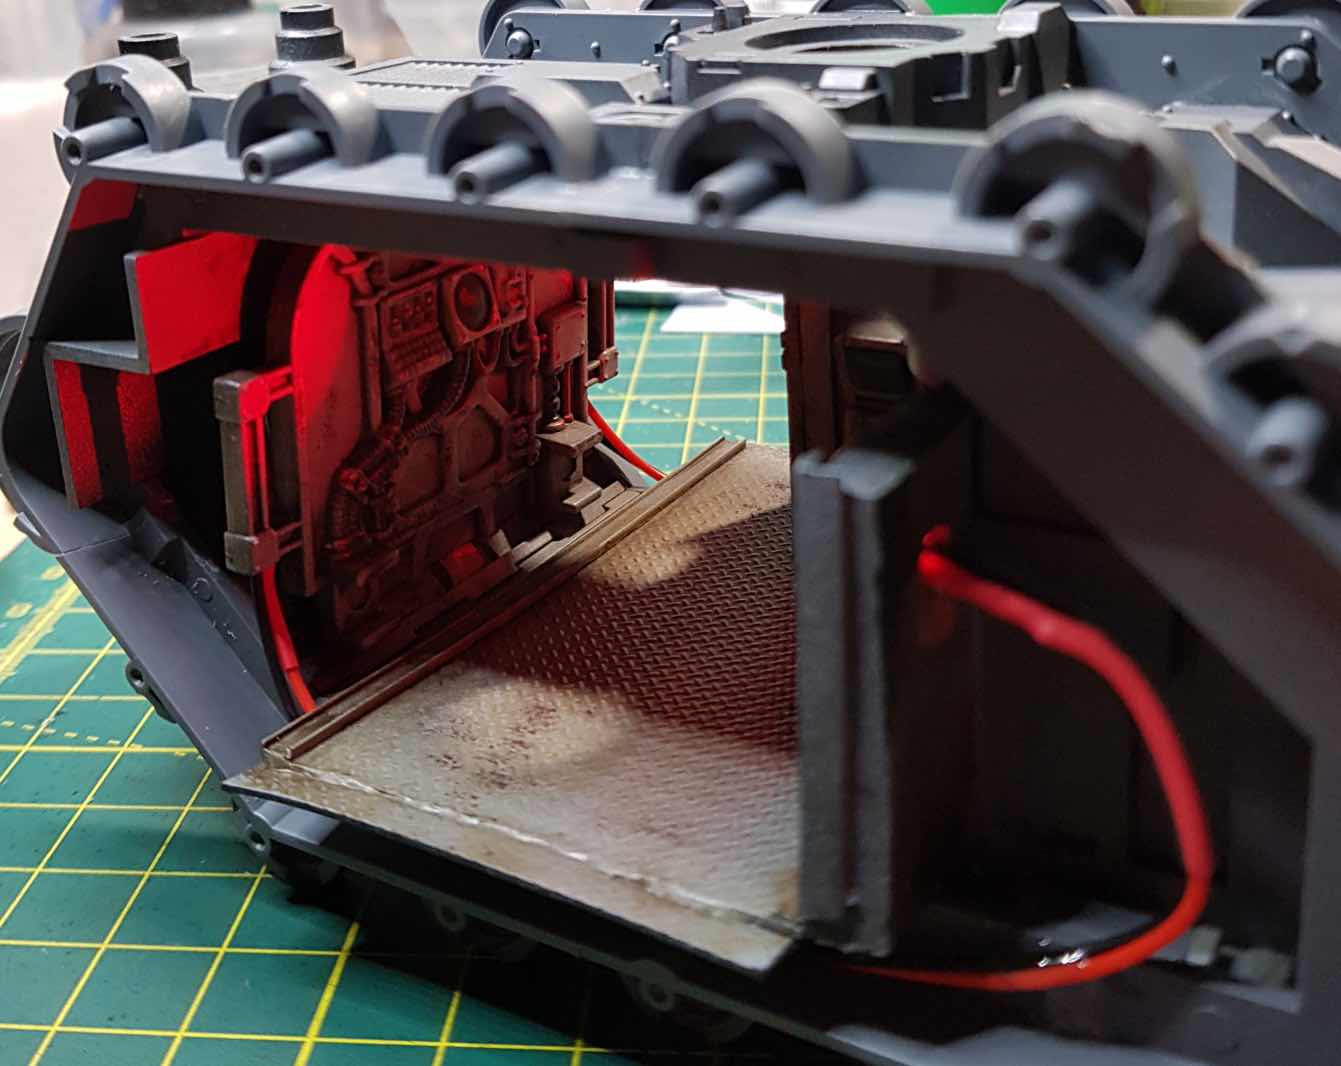
During this process, I kept checking the connectors and if the lights were on, because as soon as the sides are glued in place there would be no way I would ever be able to get to the connector block again !
In hindsight (and yes, I suffer this a lot, but I make learnings out of them for next time!), I should have hidden the on/off switch under the floor, but as usual I went way too fast and was pondering where to put the on off switch and battery..
The only place would be the bottom of the tank, so I drilled through the rear, fed the wiring through and glued the switch and battery holder underneath the tank.

I think the finished result works really well, I made it so that I can either have the Land Raider with open or closed doors.
I look forward to working with LED's in the future !

Cheers for reading, any questions please ask away, I'm more than happy to help where I can.
Eyecon74
No comments:
Post a Comment