Showing posts with label Mastodon. Show all posts

Monday, 12 September 2016

Sons of Horus Mastodon

Hello all!

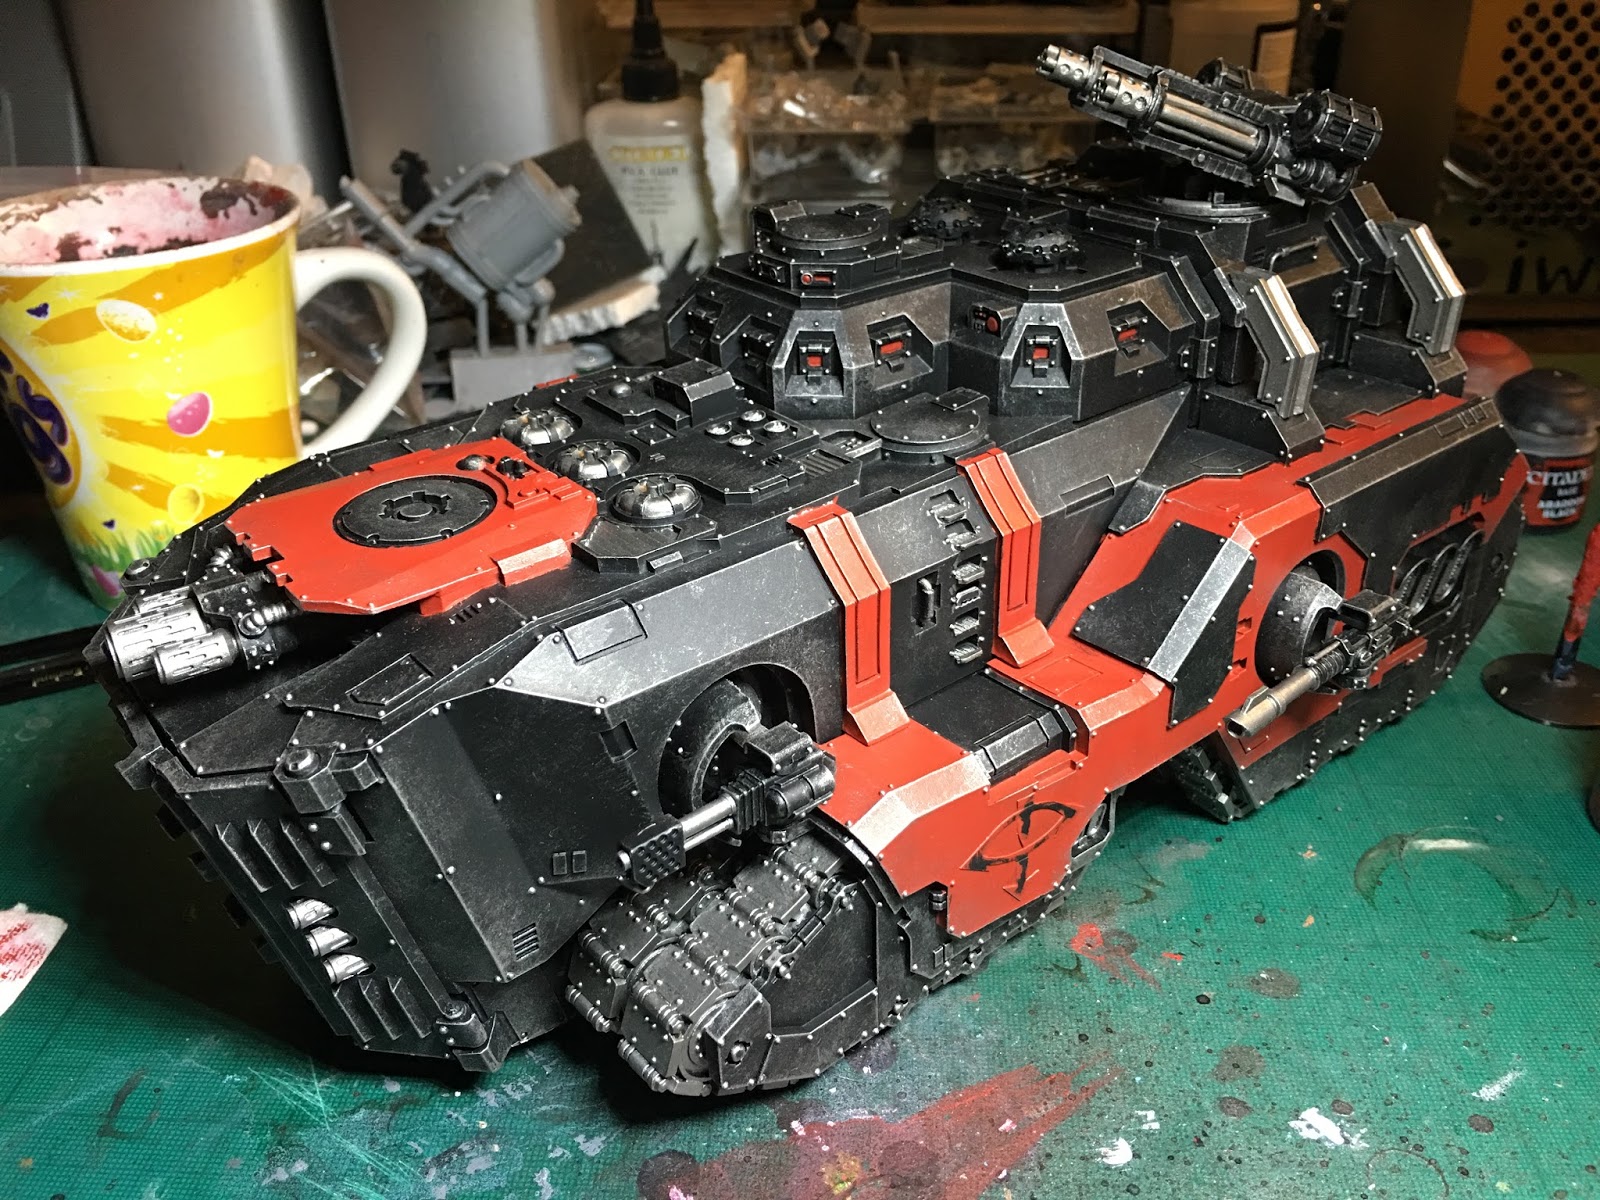
Last week I was able to get my Mastodon finished off. It is a big tank!! I enjoyed painting it but I'm pleased it is finished, holding the tank while painting was also difficult due to the weight of it! Hopefully I will be able to get it onto the tabletop for some gaming in the next couple of weeks, I'm interested to see how it performs.


As you may have seen through the rest of my updates, I have also been painting up the interior of the tank. I have essentially painted the inside the same as the outside but I have picked out as many of the small details that I can to add to the overall look.


Overall I'm really pleased with how it has come together. It makes a great centre piece to my Sons of Horus First Company and it will be fun driving loads of Justaerin around the board! 


Happy hobbying!

Darien

Friday, 2 September 2016

Mastodon Update

Hello all!

I have been spending the last week working on the Mastodon. It is coming along well and I have now finished applying the silvers to the whole model, which took a loooong time! I am pleased with how it has come together so far.


As I have gone along I have been painting up the inside as well, quite a few small details I want to pick out, like around the door keypads and the computer that is on one of the sides. 


Next up is adding the brass details, there is a lot I want to brass up and just like the silver it's going to take a while to get around them up! Hopefully I will get some painting time over the weekend and early next week to get it finished off.

Happy hobbying!

Darien

Wednesday, 27 July 2016

Imperial Fists Mastodon Part 1


Hello guys and welcome to the first installment of my Imperial Fists Mastodon build. 
Darien and I were amongst the lucky few to get our hands on one of these fantastic new kits. 

Why the two build posts?

Well it's fair to say that with all new kits there are some differences in people's experiences and issues with building them. So as the good wide reaching blog that we are Darien and I hope to enable everyone who ventures into building one of these with the widest depth of knowledge on potential issues pitfalls and work arounds so you all have an enjoyable experience. 

We have some shared issues and some slightly different ones so hopefully this will help everyone :)

First up the wash!


I didn't have many issues in this area in fact after an overnight soak and then a brush up with a nail brush and a tooth brush all parts seemed to be clean of any  mould release. 

I started with some of the easy stuff to get it out of the way and not in necessarily the order in the instructions. 
This is a personal preference as it means I don't have to worry about it and go back to it later. 
So I cleaned up and then 'heat shaped' the track sections to fit the main track assembles. 


I did this by heating them in a bowl of hot water *be careful kids* and then pressing them into the recesses to ensure a nice fit and that the track sections blended into the main assembly. 

Next up was cleaning up, cutting, shaving material off, filing and test fitting the floor sections.
This took forever and I didn't take WIP shots of his process.  
I also fitted the doors and the hinges to the sides including the additional interior detail. I've purposely left off the hydraulic rams as I'll be painting the inside I wanted to make sure I made it as easy for my self as possible. 


A point to note is that fitting one side to the floor sections is a good way forward not only is it advised in the instructions,  Blake Spencer himself advised both myself and Darien on the intricacies of the main hull section. Once that's built the rest goes together fairly easily, he said lol. 


As you see this dry fit shows that the kits aren't perfect and so some heating of parts maybe required to ensure a good fit. 


The superstructure was a bit of a pig for me and took a while of shaving material filing and sanding to get the fit just right. 


Unfortunately this is an 'after shot'. What I've done here is to modify it slightly, as with Darien's, my rear ramp doesn't fit. So I've taken the alternative measure to remove a small lip on the lower part of the super structure either side of the 'V' section very carefully so it looks to be normal. 
As a result the rear ramp now folds up into the superstructure a treat :)
 
I'll be following up soon in part two with additional build parts I plan on make the turret next so that everything is ready for priming and base coat.
I hope this helps and if you have any questions or comments below feel free.

Until next time, The Emperor Protects!

- Tylar

Monday, 25 July 2016

Mastodon Progress Part 1

Hello all!

As you may have seen I was one of the lucky ones to get my hands on the new Mastodon at the Forgeworld open day! I completed an Unboxing video for the kit as so as I got it home and this can be seen here if you missed it. I have spent most of my hobby time in the last week getting it assembled. It has been fun but not without its challenges. To help any of you along that may be purchasing one soon, I took photos as I went to help with any difficult bits.

For the most part the instructions Forgeworld have provided are great and I have basically followed them during my build. Usefully each resin piece is numbered so you can match up the parts in the instructions with the correct resin part. This is a great idea however it appears that none of the numbers match up!! I think I have only found 1 piece with correct number on it so far, so it was back to visually matching up. Thankfully the instructions are very clear and it hasn't caused any problems.

First up was getting the kit washed. I washed it twice and some parts still came up shiny. I will be purity sealing the model prior to base coating.


The gluing has to start some where and the Mastodon gives you a nice easy start! Attach the secondary meltas to the front doors! 8 pieces down!


The next step is to get the insides together. I had 2 issues with this part. The bottom hinge on both front doors didn't fit into the bracket as it was full of resin. I had to drill the excess resin and trim the hinge on the door down a bit. The second issue is with the push fit Pistons on the door. One of them won't stay in place, I have tried heating and bending the bracket. Each time I think I have it, it falls out again!! 

With the sides done, it was time to tackle the floor. It is split into 3 parts and you need to get each to them to fit together correctly or the the rest of the tank won't go together right. I spent a good few hours dry fitting/filing/cutting/heating bits to get them to the point I was happy. I found it really useful to turn the tank upside down to help wth the flooring. You also need to be checking the roof sections, bulk heads and rear door during all of this. The rear door is very useful as it will hold the sides to the correct width. Elastic bands also came in very handy! Keep checking the front doors as well, as you could end up with a large gap between them if you're not careful. 


To ensure that everything was ok in the dry fit, I made sure that I checked with the top two panels in place so that I didn't have a nasty surprise and end up with large gaps on top! I used elastic bands to hold it all together while checking fits and making adjustments to the various parts. 


During this I came across a problem with the rear of the Mastodon. The ramp doesn't sit very well with the top of the superstructure. With the ramp closed fully the top sits on top of the ramp and not on the sides as it should. 


The photo above shows the 'large' gap of several millimetres. The photo below shows the superstructure in place as it should be and that the ramp doesn't close correctly. I will need to remove some of the inside of the ramp to get it to fit correctly but I haven't done this yet. 


Once I had all the parts going together as I wanted it was time to glue! The instructions says to do each side to the floor separately but to ensure it all glued together correctly I decided to glue all the bits at the same time and then wrap it in elastic bands to hold it all together while it dried! I laid it out like this and applied the glue to all the parts required. It needed to be quick and I wanted everything ready and to hand. 


It went surprising well and everything went into place as planned! All glued: 


With this all done, life gets a lot easier! The tracked sides go on very easily and I made good use of elastic bands to hold them in place. Again I did both sides at once. 


Whilst this was setting I sorted out the top. Very straight forward, glue two large pieces of resin together and add another underneath. 


This is where I am up to now. Very happy with the progress so far and how it has gone together. All that is left is adding the weapons and finishing details. I will also be adding magnets to the front and rear doors to keep them shut. The front doors have a tendency to fall open at the moment! Usefully Forgeworld have added pre-drilled holes for magnets on both sets. 


Finally Commissar Ibram Gaunt asked for a size comparison with a rhino, so here it is!

I will be continuing work on the Mastodon this week when I can. I have Throne of Skulls at the weekend so hobby time is a bit limited this week as my days off will be spent battling the forces of the Imperium! 

Happy Hobbying!

Darien 

Sunday, 17 July 2016

Mastodon Unboxing video

Hello all!

The Bunnies had a great time at the Open Day, we hope you enjoyed our coverage! Hopefully we were able to answer a lot of the questions you asked in the comments and let us know if there is anything else that we maybe able to answer for you!

I was lucky enough to get my hands on the new Mastodon, only 27 were available today! It will be joining my Sons of Horus First Company. As it is an awesome model I thought I would do an unboxing video for you all to see what the kit looks like! It is a great looking kit and should be fun to assemble and paint.

You can watch the video on the Battle Bunnies YouTube page here. Hope you enjoy!

It comes in one of the red boxes that the Warlord Titan comes in! Here are a couple of pictures of some of the parts from the video:


It also comes with the new style instructions which look really good! 


Overall looks like a great kit! I'm hopeful that I will be able to get it washed and started assembly by the end of the week! Keep your eyes on the blog for further updates! 

Happy Hobbying! 

Darien